Tendon Neuroplastic Training: A Game-Changer in Tendonitis Rehab

Introduction:

Neuroplasticity, the phenomenon of altering neuronal connections in response to various stimuli, plays a vital role in the body’s ability to adapt, learn, and recover from injuries. When it comes to tendonitis, a condition that affects tendons in both upper and lower limbs, the concept of Tendon Neuroplastic Training is revolutionizing rehabilitation. In this article, we explore what Tendon Neuroplastic Training entails and how physiotherapy can enhance its effectiveness.

Understanding Tendonitis and Its Rehabilitation Challenges:

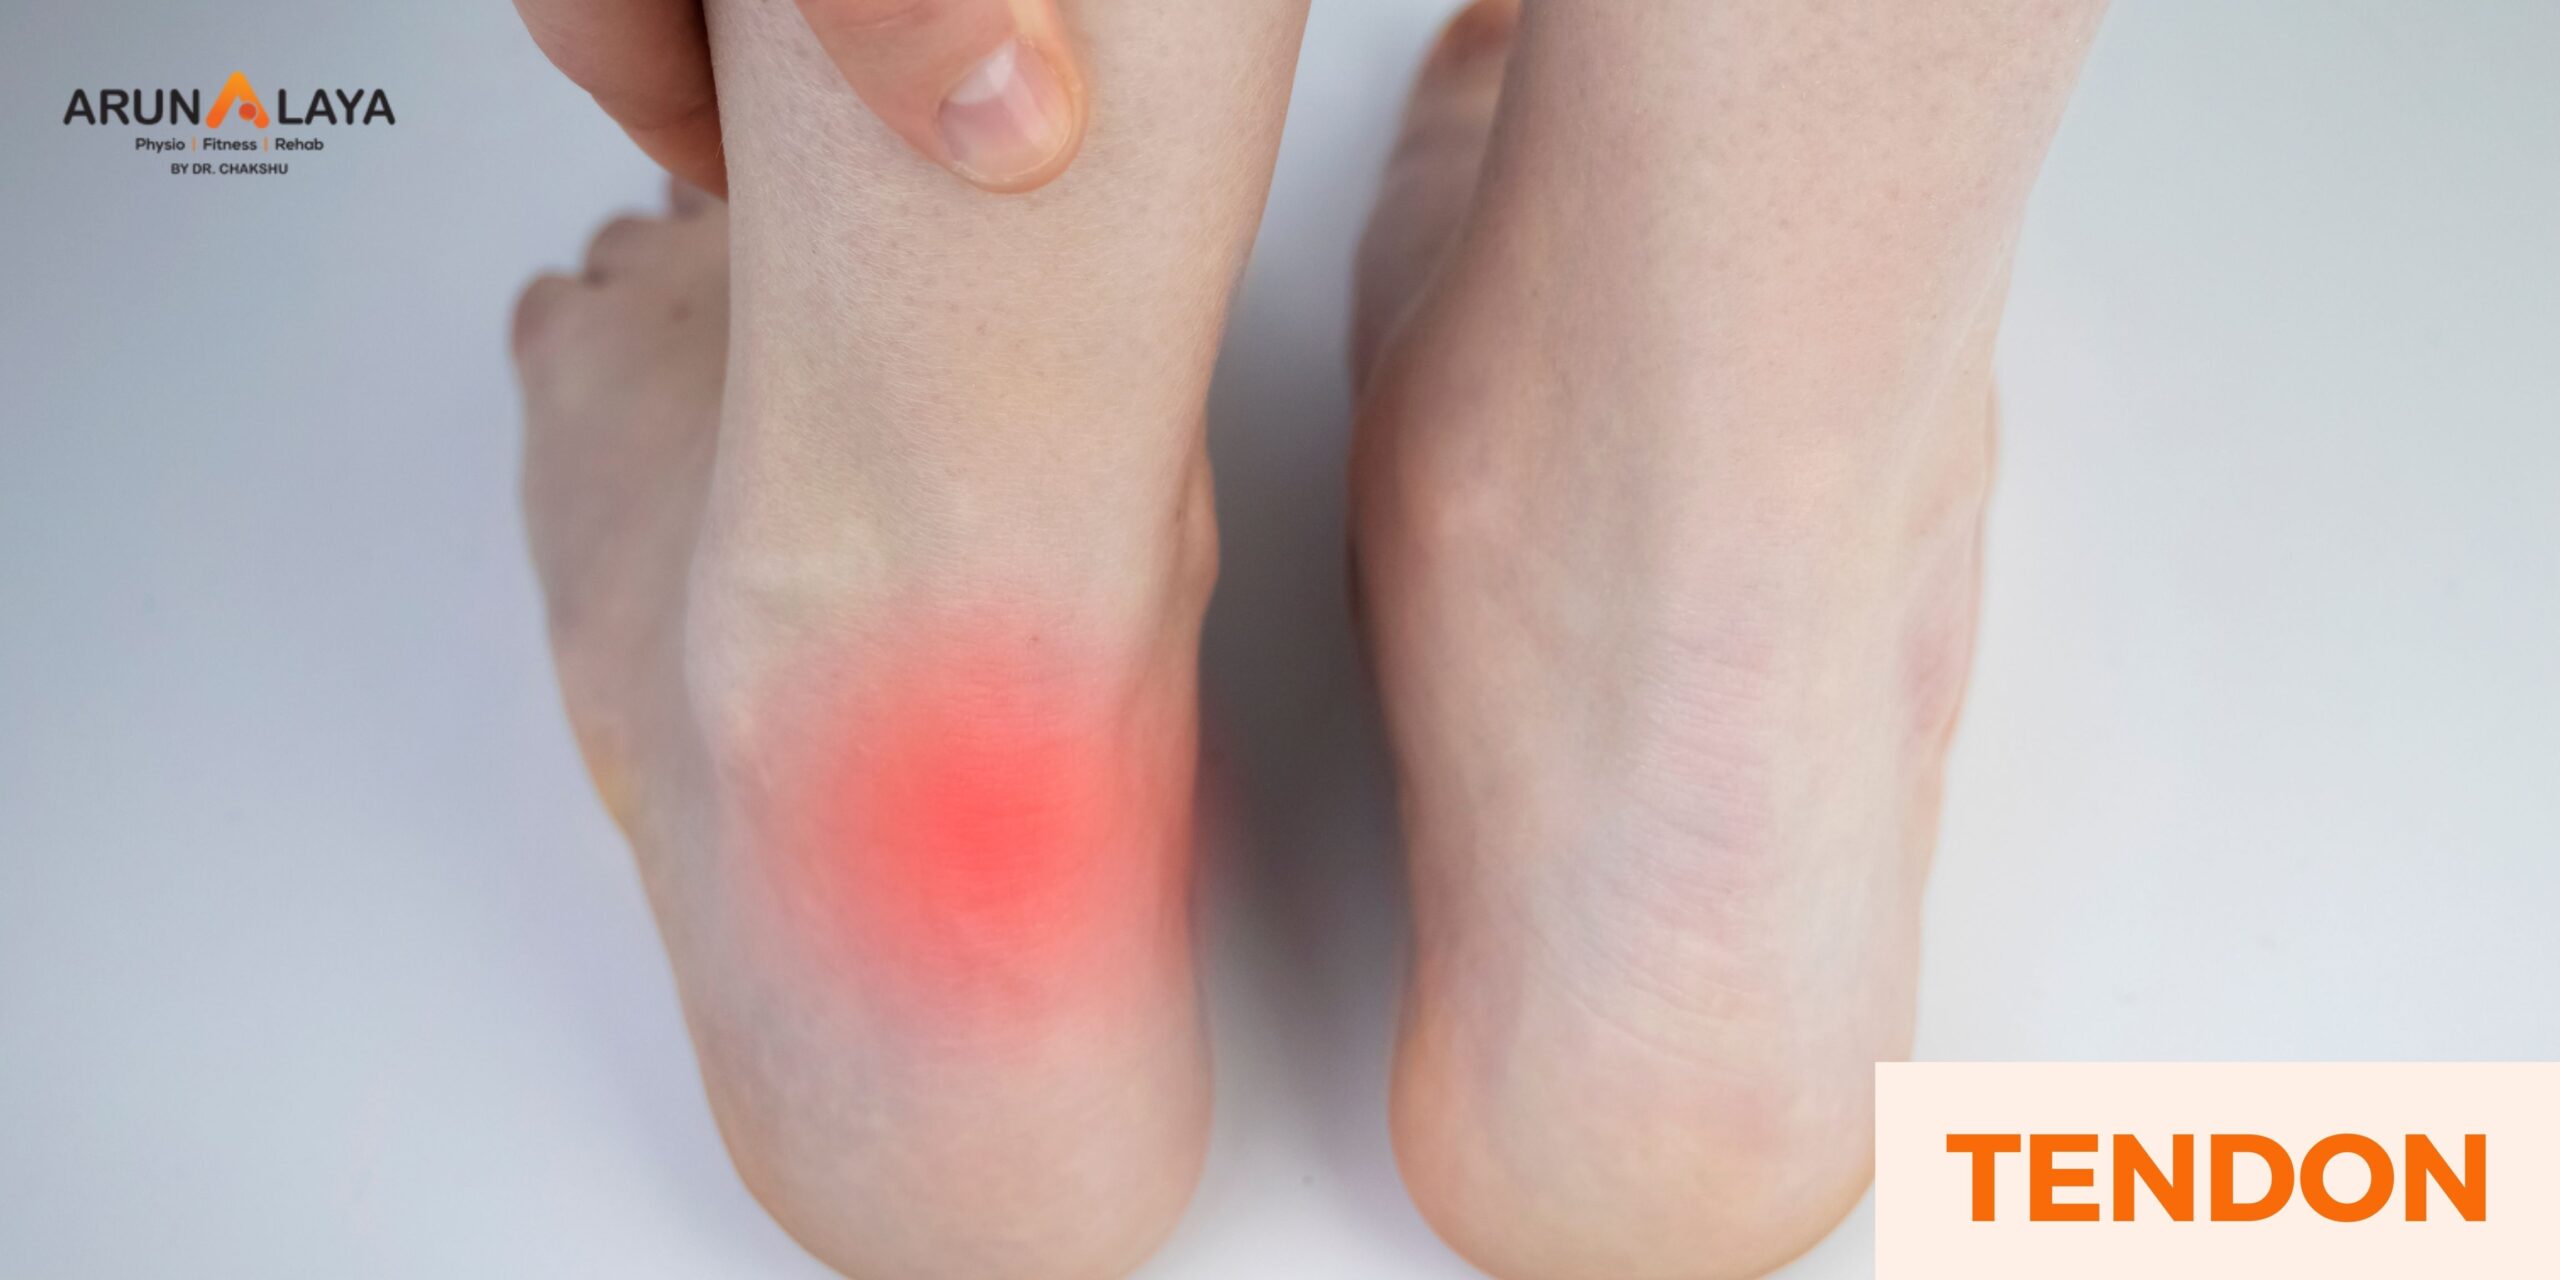
Tendonitis can impact tendons in various areas of the body, such as tennis elbow, golfer’s elbow, patellar tendonitis, Achilles tendonitis, and high hamstring tendonitis. Although exercise therapy has traditionally been the primary approach to alleviate tendonitis pain, returning to sports activities can be a struggle. The challenge lies in not only strengthening the muscles but also optimizing motor control, the ability to contract muscles smoothly.

Introducing Tendon Neuroplastic Training:

Tendon Neuroplastic Training is a groundbreaking approach that shifts the focus from merely targeting the tendons and muscles to directly engaging the nervous system. This innovative concept transforms how individuals perform strengthening exercises, retraining the brain and body to enhance the overall effectiveness of tendonitis rehab.

Tendons Suited for Tendon Neuroplastic Training:

This unique training methodology is suitable for most lower limb tendons, including Achilles, patellar, and hamstring origin tendons. Additionally, it can be applied to upper limb tendons affected by conditions like tennis or golfer’s elbow. To determine the suitability of Tendon Neuroplastic Training for your specific case, it is advisable to consult with a knowledgeable physiotherapist or sports doctor.

The Role of Physiotherapy in Tendon Neuroplastic Training:

Physiotherapy plays a pivotal role in implementing and optimizing Tendon Neuroplastic Training. Here’s how physiotherapists contribute to this innovative approach:

  1. Assessment: Physiotherapists conduct a comprehensive assessment to identify the specific tendonitis issues and the areas that require attention.
  2. Customized Training: Based on the assessment findings, physiotherapists create a tailored Tendon Neuroplastic Training program that addresses the individual’s unique needs and goals.
  3. Guidance and Feedback: Physiotherapists guide patients through the training process, ensuring they understand and perform exercises correctly. They provide ongoing feedback and adjustments as needed.
  4. Motor Control Enhancement: Physiotherapists focus on improving motor control by incorporating metronome training into the program. This method helps individuals contract their muscles smoothly and enhances the success of tendonitis rehabilitation.

Conclusion:

Tendon Neuroplastic Training is a game-changer in the realm of tendonitis rehabilitation, offering a novel approach that targets the nervous system to enhance results. With the guidance and expertise of physiotherapists, individuals can harness the power of neuroplasticity to recover more effectively from tendonitis, improving both muscle strength and motor control. This innovative combination empowers patients to return to their sports and activities with confidence and reduced pain.

Empowering Women Through Pelvic Floor Physiotherapy: Navigating Menopause With Confidence

Title: “Navigating Menopause with Pelvic Floor Physiotherapy: Prioritizing Women’s Wellness”

Introduction:

Menopause is a significant natural phase in a woman’s life, signifying the end of her reproductive years. While it is a momentous transition, it is accompanied by various physical and hormonal changes, some of which can impact a woman’s pelvic health. Pelvic floor physiotherapy has emerged as a vital component in addressing the challenges that menopause may bring.

Understanding Menopause and Its Implications:

Menopause typically occurs between the ages of 45 and 55 when a woman’s ovaries cease to produce eggs, leading to a decline in estrogen and progesterone hormones. This hormonal shift can result in a range of symptoms, including hot flashes, mood swings, and alterations in vaginal health.

Effects on Pelvic Health:

Menopause can influence pelvic health in multiple ways:

  1. Vaginal Dryness and Atrophy: Diminished estrogen levels can lead to vaginal dryness, thinning of vaginal walls, and reduced elasticity, causing discomfort, pain, and an increased susceptibility to vaginal infections.
  2. Urinary Incontinence: Changes in pelvic muscles and tissues can contribute to urinary incontinence, ranging from mild leakage to more severe issues.
  3. Pelvic Organ Prolapse: Weakened pelvic floor muscles may lead to the displacement of pelvic organs, such as the bladder, uterus, or rectum, resulting in discomfort or pain.

The Role of Pelvic Floor Physiotherapy:

Pelvic floor physiotherapy stands as a non-invasive and highly effective treatment option for addressing pelvic health challenges during menopause. Here’s how it can offer assistance:

  1. Strengthening Pelvic Floor Muscles: A skilled pelvic floor physiotherapist can devise a personalized exercise regimen to fortify weakened pelvic floor muscles. These exercises can alleviate incontinence and enhance pelvic support.
  2. Education and Lifestyle Guidance: Women undergoing menopause can greatly benefit from expert counsel on managing their pelvic health through lifestyle adjustments, encompassing diet, hydration, and exercise.
  3. Techniques for Vaginal Health: Pelvic floor physiotherapists can educate women on techniques for maintaining vaginal health, including the utilization of vaginal moisturizers and dilators.
  4. Pain Management: For women enduring pelvic discomfort or pain, physiotherapy can offer relief through manual techniques and tailored exercises.

Conclusion:

Menopause represents a transformative stage in a woman’s life, and it need not be synonymous with discomfort or pain. Pelvic floor physiotherapy embraces a holistic approach to managing pelvic health concerns associated with menopause, allowing women to regain control and live their lives comfortably and confidently. Seeking the guidance of a qualified pelvic floor physiotherapist empowers women to gracefully navigate this phase with vitality and well-being.

Ease Aches and Pains with Simple Desk Exercises: Enhance Your Office Work Well-Being

Introduction: Office work often takes a toll on our physical and mental health, resulting in postural, muscular, and joint problems. The risks of prolonged sitting are well-documented, with consequences like back pain, poor circulation, and even mental health issues. Good posture is key to preventing these problems, and physiotherapy can play a significant role in helping office workers stay healthy. In this article, we’ll explore easy exercises that office workers can do at their desks to alleviate aches and pains and improve overall well-being.

Understanding Office-Related Problems:

  1. Postural Challenges: Office work often leads to poor posture, including issues like Text Neck, Forward Head Posture, Upper Cross Syndrome, and rounded shoulders. More severe postural problems like scoliosis, lordosis, and swayback can also develop.
  2. Physiotherapy Solutions: Physiotherapy offers a tailored approach to address these posture-related issues by identifying weak muscles and imbalances and then strengthening the muscles or loosening stiff joints accordingly.

Preventative Desk Exercises: To enhance the well-being of office workers and prevent aches and pains, consider the following exercises:

  1. Standing Chest Stretch: Open your chest and relax your shoulders to prevent rounded shoulders.
  2. Thoracic Extension and Rotations: These exercises help combat stiffness and slouching.
  3. Head Side Pulls and Pull-Downs: Relieve stress and tension in the neck, enhancing comfort during work hours.
  4. Shoulder Shrugs: These exercises can alleviate stress and tension in your shoulder muscles.
  5. Upper Back Stretch: Improve circulation in your upper body, countering the effects of prolonged sitting.
  6. Torso Stretch: Enhance your posture by targeting your torso muscles.
  7. Neck Stretches: Relieve tension and reduce the risk of headaches caused by muscle strain.
  8. Inner Thigh Stretches: Relieve tightness and tension in your lower body, which can develop from prolonged sitting.
  9. Wall Press: Strengthen your back muscles and promote a straighter posture.
  10. Practicing Good Posture: Developing and maintaining good posture is essential to prevent a multitude of health issues associated with office work. Regularly remind yourself to sit and stand with proper alignment.

Conclusion: The well-being of office workers is significantly impacted by their daily work routines. Prolonged sitting, poor posture, and musculoskeletal issues are common problems in office settings. While physiotherapy can provide personalized solutions, these simple desk exercises can also make a difference. Incorporating these exercises into your daily routine can help alleviate aches and pains, improve posture, and enhance your overall well-being, ensuring that your time at the office is not detrimental to your health.

Shoulder Instability and the Vital Role of Physiotherapy

Introduction: If you’ve ever experienced the unsettling feeling that your shoulder might pop out of place, you’re not alone. Shoulder instability is a common issue that can significantly impact your daily life. It often leads to pain when lifting your arm and can make everyday tasks a real challenge. In this article, we’ll delve into the two main types of shoulder instability, traumatic and atraumatic, and explore the critical role of physiotherapy in its treatment.

Understanding Traumatic and Atraumatic Instability:

  1. Traumatic Instability: This type is more common in active individuals, especially in sports like football and hockey. It typically results from a sudden injury or dislocation, making the shoulder prone to recurring instability.
  2. Atraumatic Instability: Atraumatic instability, or multidirectional instability (MDI), affects the shoulder in multiple directions due to inherent ligamentous laxity. Individuals with MDI have looser ligaments surrounding the shoulder, causing excessive range of motion, muscle weakness, and episodes of the shoulder “giving way.”

Common Signs of Atraumatic Shoulder Instability:

  • Excessive Range of Motion
  • Weakness in Rotator Cuff and Scapular Stabilizers
  • Poor Dynamic Stabilization
  • Clicking and Popping Sensations
  • Episodes of Shoulder Instability

The Role of Physiotherapy: Physiotherapy plays a pivotal role in the treatment of shoulder instability, offering numerous benefits and comprehensive treatment approaches.

Benefits of Physiotherapy:

  • Muscle Strengthening: Physiotherapy helps strengthen the muscles around the shoulder joint, reducing instability.
  • Improved Flexibility: It enhances flexibility in the shoulder joint, allowing for more comfortable and unrestricted movement.
  • Posture and Body Mechanics: Physiotherapy aims to improve posture and body mechanics to reduce strain on the shoulder joint and prevent further injuries.

Physiotherapy Treatments:

  • Modalities: Techniques such as ultrasound and electrical stimulation help alleviate pain associated with shoulder instability.
  • Manual Therapy: Advanced manual techniques, including muscle release and stretching, are employed to relieve discomfort and improve muscle health.
  • Ergonomic Advice: Physiotherapists may recommend lifestyle changes, such as ergonomic adjustments, to enhance patient outcomes.
  • Dry Needling: This advanced technique reduces muscle tightness and enhances muscle health.
  • Kinesio Taping: Used to strengthen weak muscles and inhibit tight ones, this method aims to restore balance to the shoulder joint and improve stability.

Conclusion: Shoulder instability can be debilitating, affecting everyday tasks and causing discomfort. Whether your instability is traumatic or atraumatic, physiotherapy offers valuable solutions for recovery. By strengthening muscles, increasing flexibility, and optimizing posture and body mechanics, physiotherapy helps patients regain confidence in their shoulder’s stability. If you’re grappling with shoulder instability, consider consulting a physiotherapist who can tailor a treatment plan to your specific needs and get you on the path to a more stable and pain-free shoulder.

Dry Needling for Pain Relief: A Comprehensive Guide

Introduction: Dry needling, a specialized technique utilized by skilled physiotherapists and other healthcare practitioners, has gained recognition for its effectiveness in addressing musculoskeletal pain and dysfunction. This treatment involves the precise insertion of thin needles into trigger points or tight muscle bands, resulting in pain relief, muscle tension reduction, and improved muscle function. In this article, we delve into the science behind dry needling, its technique, and the myriad benefits it offers.

The Technique of Dry Needling: Dry needling employs thin, solid needles similar to those used in acupuncture. These needles are inserted into specific areas, including muscles, ligaments, tendons, subcutaneous fascia, scar tissue, and even near peripheral nerves or neurovascular bundles. The primary aim is to manage neuromusculoskeletal pain syndromes. Dry needling specifically targets myofascial trigger points, which are hyperirritable contraction knots in muscles associated with localized and referred pain.

Understanding Trigger Points: Trigger points are tight knots within muscle fibers that can cause localized pain, referred pain patterns, restricted range of motion, and muscle tension. Dry needling is designed to release these trigger points by triggering a twitch response, which involuntarily contracts and then relaxes muscle fibers. This response enhances blood flow, promotes muscle relaxation, and reduces pain.

How Dry Needling Works:

  1. Identification: During a dry needling session, a trained physiotherapist identifies trigger points contributing to pain and discomfort.
  2. Needle Insertion: Thin needles are gently inserted into these trigger points, targeting tense muscle bands.
  3. Stimulation: The process stimulates the body’s natural healing mechanisms, promoting circulation, releasing endorphins, and encouraging tissue repair.

Benefits of Dry Needling:

  1. Pain Relief: Dry needling provides rapid relief from both acute and chronic pain by releasing tension within trigger points.
  2. Improved Muscle Function: By targeting and releasing trigger points, dry needling restores proper muscle function, enhancing movement and flexibility.
  3. Complements Other Treatments: It can be seamlessly integrated into a comprehensive physiotherapy plan, including exercises, manual therapy, and more.
  4. Enhanced Blood Flow: Needle insertion increases blood flow, aiding in nutrient delivery and waste removal.
  5. Quick Recovery: Patients often experience minimal discomfort during the procedure and report feeling better shortly after the session.
  6. Holistic Approach: Dry needling addresses the root cause of pain, considering the interconnectedness of the body rather than just alleviating symptoms.

Conclusion: Dry needling is a powerful tool in the realm of pain relief and musculoskeletal rehabilitation. By targeting trigger points, this technique promotes healing, muscle relaxation, and enhanced muscle function. If you’re dealing with acute or chronic pain, muscle tension, or dysfunction, consider consulting a skilled physiotherapist to explore the benefits of dry needling as part of your personalized treatment plan.

Taping in Physiotherapy: More Than Just a Trend

Introduction: Taping in physiotherapy serves a pivotal role, emphasizing functionality over fashion. It’s a practical approach, primarily employed to provide support to injured or unstable joints, alleviate pain, and actively contribute to the rehabilitation process. In this article, we delve into the therapeutic functions, types, and application of taping in physiotherapy.

Taping’s Therapeutic Functions:

  1. Support and Stability:
    • Protective Reinforcement: Taping acts as a guardian, offering support and stability to vulnerable joints, such as ankles, knees, or wrists. This safeguard helps avert excessive movement and strain during physical activities, contributing to the protection and recovery of injured areas.
  2. Pain Reduction:
    • Altering Pain Perception: Taping techniques play a role in pain management by influencing the way nerves perceive pain signals. By gently altering this perception, taping contributes to pain reduction, making it a valuable tool in the arsenal against discomfort.
    • Compression for Swelling: Taping is instrumental in addressing swelling by providing compression. This controlled pressure aids in reducing inflammation, further promoting pain relief.
  3. Improved Muscle Function:
    • Enhancing Coordination and Activation: Taping isn’t just about immobilization; it also encourages improved muscle function. By offering valuable feedback to muscles, it enhances their coordination and activation, ultimately facilitating a smoother rehabilitation process.

Exploring Different Types of Taping:

  1. Kinesiology Tape:
    • Dynamic and Colorful: Kinesiology tape is the dynamic, colorful tape that often adorns athletes. Designed to mimic the elasticity of human skin, it provides support without hindering movement. This type of tape is commonly employed for muscle and joint injuries.
  2. Athletic Tape:
    • Rigid and Sturdy: In contrast to kinesiology tape, athletic tape offers rigidity and stability, making it ideal for joint support. It restricts movement to a greater extent, frequently finding use in sports like volleyball or basketball.

Taping Application: 3. Customized Application:

  • Taping in physiotherapy is not a one-size-fits-all approach. Rather, it’s a customized endeavor. Trained physiotherapists assess each individual’s unique condition and therapeutic goals. They then apply the tape with precision, tailoring it to the patient’s specific needs.

Conclusion: Taping in physiotherapy goes beyond being a mere trend; it’s a fundamental component of the rehabilitation process. Its therapeutic functions encompass providing support, reducing pain, and enhancing muscle function. Whether it’s the dynamic kinesiology tape or the sturdy athletic tape, the choice is guided by the patient’s condition. The key takeaway is that taping, when applied by trained professionals, proves to be a highly effective tool in the journey to recovery and improved physical well-being.

Class 4 Laser Therapy

Your body has amazing systems that it can use to heal itself. However, sometimes it needs a little external help to get these systems fired up and working to your benefit. Class 4 laser therapy harnesses these processes using focused light. It stimulates a process called photobiomodulation (PBM).


Mechanism of action of class 4 laser:

  • The therapeutic effect of laser light is based on biostimulation and the acceleration of cellular processes that contribute to pain reduction and faster recovery after injury. The photomechanical wave stimulates nerve endings, which leads to pain relief. Biostimulation of the affected tissue increases oxygen uptake and improves blood circulation.
  • The unique combination of 30 W power and 1064 nm wavelength targets deep-lying tissues, maximises pain relief, and delivers strong thermic therapies within a short time.

Effects of class 4 laser therapy:

  • Reduced pain and swelling
  • Improved range of motion
  • To reduce pain and inflammation in musculoskeletal disorders and injuries and joint pain.
  • Increases tissue regeneration
  • Accelerates soft tissue and bone repair
  • Improve nerve regeneration & function as well as impact your cells to increase cell metabolism, enzymatic responses, collagen production, and promote angiogenesis
  • Improve your musculoskeletal health

What Are The Side Effects Of Laser Therapy?

  • Redness, swelling and itching. Treated skin may be itchy, swollen and red
  • Acne
  • Infection
  • Changes in skin color
  • Scarring
  • Turning of the eyelid
sports hamstring

Rehabilitation of Hamstring Injuries

High-speed running, kicking, and sprinting frequently cause athletes to experience hamstring injuries, which primarily affect the muscle group known as the hamstrings.

To ensure successful rehabilitation for these injuries, it is important to adhere to the following general principles:

1. Train Movements and Muscles

The hamstrings, a muscle group consisting of three individual muscles, play different functional roles based on their anatomical positions. During sprinting, the biceps femoris (BF) undergoes the highest strain, the semitendinosus (ST) experiences the greatest lengthening velocities, and the semimembranosus (SM) primarily generates force. Therefore, it is important to target the injured muscle with specific exercises that aim to develop its particular functional role.

2. Prescribe Strength exercises to achieve a specific goal

Eccentric Training

The terminal swing phase of sprinting generates high eccentric forces. Modifying eccentric force deficits is essential as they contribute to the risk of future hamstring injuries. Hence, rehabilitation should prioritize training to develop the capacity for generating high eccentric force.

Get Long and Strong

The shortening of fascicles can predispose the hamstrings to (re-)injury, and eccentric training can help overcome this problem. Previous studies have demonstrated significant improvements in eccentric strength and fascicle lengthening with high-volume eccentric training programs incorporating the Nordic hamstring exercise. However, recent research has shown that similar improvements can be achieved with a low-volume program consisting of 2 sets of 4 repetitions once a week.

Isometric Training

During the swing phase’s conclusion, the hamstrings’ contractile element can remain relatively isometric, as the tendon primarily elongates the muscle-tendon unit. Maintaining a good isometric condition of the muscle reduces mechanical load and facilitates the tendon’s spring-like behavior during the stretch-shortening cycle.

As hamstring injuries are consistently associated with fatigue, and most injuries occur in the final third of sprint training sessions, incorporating strength training under fatigued conditions has shown substantial reductions in injury rates. Isometric training of the hamstrings, such as utilizing the single-leg Roman chair hold, can enhance hamstring muscle endurance and serve as a valuable addition alongside the traditional Nordic hamstring exercises.

After an injury, the body’s response involves reducing myoelectric activity in the muscle as a protective mechanism to unload healing tissues. In some cases, this selective inhibition may persist and requires targeted rehabilitation. Isometric contractions have been shown to elicit higher voluntary muscle activation, making them effective in overcoming selective muscle inhibition. It is advisable to incorporate high-load isometric exercises to improve motor unit recruitment. In injuries where pain and disability are the primary concerns, isometric loading may be a more feasible approach before progressing to eccentric loading of the tissues.

Apply a multivariate model and target contributing factors to injury risk

Poor motor control of the pelvis can increase strain on the hamstrings and contribute to deficits in force production. Therefore, it is advisable to incorporate training for the lumbo-pelvic region, targeting movement in different planes.

Apart from the lumbo-pelvic region, the hip plays a vital role in maintaining optimal hamstring function. Weakness and decreased activation of the gluteus maximus serve as risk factors for hamstring injuries. Insufficient hip flexion exposes the hamstrings to a higher risk of injury, as the body compensates by increasing pelvic rotation during high-speed running, consequently placing greater strain on the hamstring muscles.

Kegel Exercises: The Complete Guide

Kegel exercises are designed to strengthen the muscles of your pelvic floor, providing support for your bladder and bowel function. These exercises involve a simple clench-and-release technique that targets the pelvic floor muscles. The pelvic floor refers to a collection of muscles and tissues that form a sling or hammock-like structure at the bottom of your pelvis, supporting your reproductive organs. Weakness in the pelvic floor can contribute to problems like loss of bladder or bowel control. By regularly performing Kegel exercises, you can enhance the strength and functionality of your pelvic floor muscles.

Why Do Kegel Exercises?

  • Both women and men can benefit from performing Kegel exercises to strengthen their pelvic floor muscles.
  • Various factors, including pregnancy, childbirth, aging, and weight gain, can contribute to the weakening of the pelvic floor muscles in women.
  • The pelvic floor muscles are responsible for supporting the womb, bladder, and bowels. When these muscles are weak, the pelvic organs may descend into the vagina, causing discomfort and potentially leading to urinary incontinence.
  • Men can also experience a decline in the strength of their pelvic floor muscles as they age. This can result in both urinary and fecal incontinence, especially for those who have undergone prostate surgery.

Finding the pelvic floor muscles in Women

  • When beginning Kegel exercises, it can be challenging to identify the correct set of muscles to target.
  • One method to locate these muscles is by gently inserting a clean finger into the vagina and then tightening the vaginal muscles around the finger.
  • Another way is to attempt to halt the flow of urine while urinating. The muscles engaged in this action are the pelvic floor muscles.
  • Familiarize yourself with the sensation of contracting and relaxing these muscles.
  • However, it is important to note that stopping and starting urine regularly or frequently doing Kegel exercises with a full bladder is not recommended, as it can lead to incomplete bladder emptying and increase the risk of urinary tract infections (UTIs).
  • If you are unsure whether you have correctly identified the pelvic floor muscles, it is advisable to consult with your gynaecologist for guidance.
  • Your gynaecologist may suggest using a vaginal cone, which is inserted into the vagina and held in place using the pelvic floor muscles.
  • Biofeedback training is another helpful method for identifying and isolating the pelvic floor muscles. This procedure involves the insertion of a small probe into the vagina or the placement of adhesive electrodes on the external area of the vagina or anus.
  • During the training, you will be instructed to perform a Kegel contraction. A monitor will display whether you have engaged the correct muscles and the duration of the contraction.

Finding the pelvic floor muscles in Men

  • Men can encounter similar difficulties in identifying the appropriate group of pelvic floor muscles.
  • To locate these muscles, men can try inserting a finger into the rectum and attempt to squeeze it, while ensuring that the muscles of the abdomen, buttocks, or thighs are not tightened.
  • Another helpful technique is to contract the muscles responsible for preventing the release of gas.
  • If difficulties persist, practicing the interruption of urine flow can be a reliable method. However, it is important to note that this should not become a regular practice.

Goals and Benefits of Kegel Exercises

  • Always empty your bladder before performing Kegel exercises. As a beginner, find a quiet and private place to sit or lie down for your exercises. As you practice, you will discover that you can perform them anywhere.
  • When you start doing Kegel exercises, tense the muscles in your pelvic floor for a count of three, and then relax them for a count of three. Repeat this sequence for 10 repetitions. Over the next several days, continue practicing until you can hold the muscle tension for a count of 10. Aim to do three sets of 10 repetitions every day.
  • Do not be discouraged if you do not see immediate results. According to the Mayo Clinic, it may take a few months for Kegel exercises to have an effect on urinary incontinence.
  • Additionally, Kegels work differently for each person. Some people experience significant improvement in muscle control and urinary continence, while for others, Kegels may help prevent the condition from worsening.

Cautions

  • If you experience pain in your abdomen or back following a session of Kegel exercises, it indicates that you are not performing them correctly. Remember that while contracting your pelvic floor muscles, the muscles in your abdomen, back, buttocks, and sides should remain relaxed.
  • Lastly, it is important not to overexert yourself during Kegel exercises. Working the muscles excessively can lead to fatigue and hinder their ability to perform their essential functions.

How Can you do Kegel Exercises?

  • Both men and women can perform Kegel exercises using the same approach.
  • To begin, it is important to locate your pelvic floor muscles, often referred to as PC muscles. You can identify these muscles by interrupting the flow of urine while urinating.
  • The muscles engaged in stopping the urine flow are your PC muscles.
  • These muscles also play a role in controlling the release of gas. In men, contracting the PC muscles may cause the testicles to rise.


Try the Easiest Kegel Exercises

  • After locating your PC muscles, you can begin practicing flexing them.
  • Contract and hold your PC muscles for a duration of 5 to 20 seconds.
  • Subsequently, release the contraction.
  • Repeat this exercise 10 to 20 times consecutively, three to four times a day.
  • Gradually increase the number of contractions and the duration of each contraction.
  • Over time, this straightforward exercise can contribute to strengthening your PC muscles.
  • This, in turn, may lead to improvements in bladder control and sexual function.

Add Variety to your Workout

  • To add variety to your Kegel workout, consider trying different variations of the basic exercise.
  • For instance, you can contract and release your PC muscles rapidly, performing several repetitions in quick succession.
  • Another option is to practice contracting the muscles slowly, emphasizing control and endurance.
  • Additionally, you can experiment with different positions while performing Kegel exercises, such as standing, sitting, or lying down.
  • While engaging in Kegel exercises, make a conscious effort to avoid tightening other muscles, such as your abdominal muscles, buttocks, or thighs.
  • It is also important not to hold your breath. Instead, maintain a relaxed and steady breathing pattern while keeping the rest of your body still and relaxed.
Cyclist Palsy

Cyclist’s Palsy

Cyclist’s palsy, also known by various names such as handlebar palsy, ulnar tunnel syndrome, ulnar nerve compression, Guyon Canal Syndrome (GCS), bicycler’s neuropathy, or tardy ulnar palsy, is an overuse injury that primarily affects the hands and fingers. It occurs when the nerves in the wrist or the side of the palm near the pinky finger become compressed due to repetitive stress.

Cause of cyclist palsy

  • Cyclist’s palsy can cause both motor and sensory symptoms.
  • The motor symptoms can include weak hand grip and difficulty using fingers for precise tasks.
  • Whereas the common sensory effects include numbness, tingling, and pain.

Although cyclist’s palsy is increasingly common, it is often underreported among cyclists. In fact, a study revealed that 7 out of 10 participants reported experiencing motor or sensory symptoms. Severe nerve injury can lead to paralysis or irreversible loss of sensation in the affected hand.

The pressure exerted on the handlebars during prolonged cycling can irritate the nerves in the palm. The highest pressure occurs where the median and ulnar nerves enter the hand, which corresponds to positions like “tops,” “ramps,” “hoods,” and “drops.” The “drops” position applies the most pressure on the ulnar nerve, while the “hoods” position applies slightly less pressure. The “tops” position places significant pressure on the palm at the base of the ring finger. The “drops” position can also cause excessive wrist extension, increasing pressure on the carpal tunnel. If a cyclist already has nerve compression at the neck or elbow, it can be more easily triggered at the palm, potentially leading to carpal tunnel syndrome or cubital tunnel syndrome.

Signs and Symptoms

  • include numbness, tingling, and sensory changes in the little finger and the ring finger on the side closest to the little finger
  • the palm in that area may also become numb, while there is no numbness on the back of the hand.
  • The symptoms can vary depending on the location of pressure. Sometimes manifesting as numbness or weakness, or a combination of both.
  • When the median nerve is affected, numbness and tingling occur on the palm side of the thumb, index, long, and ring fingers (on the side closest to the middle finger). But there is no numbness on the back of the hand.
  • Prolonged or severe pressure on the nerves can also weaken the associated muscles. Some cyclists may experience pain along with hand numbness.

Treatment

Limiting cycling is the most effective treatment for cyclist’s palsies. However, there are other measures that can allow cyclists to continue their activity while reducing the risk of exacerbating the condition. These include :

  • Limiting the length or distance of the ride
  • Having enough rest between longer cycling sessions
  • Changing positions of grip on the handlebars
  • Changing to a transverse handlebar
  • Adjusting the seat height
  • Using gloves to reduce or distribute pressure. The pressure can be reduced with foam or gel padding in the palm of the glove.

Top 3 Cyclist Palsy Exercises

In addition to these measures, exercises play a crucial role in long-term recovery and preventing recurrence of cyclist’s palsy. These exercises primarily focus on strengthening the muscles, ligaments, and tendons in the hands. The top three recommended exercises for cyclist’s palsy are as follows:

  1. Finger bending exercise: Begin by stretching your hand and then bend the fingers of the affected hand at a right angle, holding them in that position for approximately 10 seconds. Ensure that your fingers remain straight during the exercise. Repeat this process five times.
  2. Finger squeeze: Take a small object like a coin or a sheet of paper and squeeze it between two fingers, holding the grip for 10 seconds. Repeat this exercise five times for each set of fingers.
  3. Grip strengthening exercise: This exercise targets a weak hand grip. Squeeze a rubber ball with the affected hand and hold for 10 seconds and then release. Repeat 10 times, and that’s one set. Aim for 3 sets of 10 as you gradually build up grip strength.