Empowering Women Through Pelvic Floor Physiotherapy: Navigating Menopause With Confidence

Title: “Navigating Menopause with Pelvic Floor Physiotherapy: Prioritizing Women’s Wellness”

Introduction:

Menopause is a significant natural phase in a woman’s life, signifying the end of her reproductive years. While it is a momentous transition, it is accompanied by various physical and hormonal changes, some of which can impact a woman’s pelvic health. Pelvic floor physiotherapy has emerged as a vital component in addressing the challenges that menopause may bring.

Understanding Menopause and Its Implications:

Menopause typically occurs between the ages of 45 and 55 when a woman’s ovaries cease to produce eggs, leading to a decline in estrogen and progesterone hormones. This hormonal shift can result in a range of symptoms, including hot flashes, mood swings, and alterations in vaginal health.

Effects on Pelvic Health:

Menopause can influence pelvic health in multiple ways:

  1. Vaginal Dryness and Atrophy: Diminished estrogen levels can lead to vaginal dryness, thinning of vaginal walls, and reduced elasticity, causing discomfort, pain, and an increased susceptibility to vaginal infections.
  2. Urinary Incontinence: Changes in pelvic muscles and tissues can contribute to urinary incontinence, ranging from mild leakage to more severe issues.
  3. Pelvic Organ Prolapse: Weakened pelvic floor muscles may lead to the displacement of pelvic organs, such as the bladder, uterus, or rectum, resulting in discomfort or pain.

The Role of Pelvic Floor Physiotherapy:

Pelvic floor physiotherapy stands as a non-invasive and highly effective treatment option for addressing pelvic health challenges during menopause. Here’s how it can offer assistance:

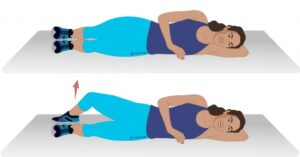
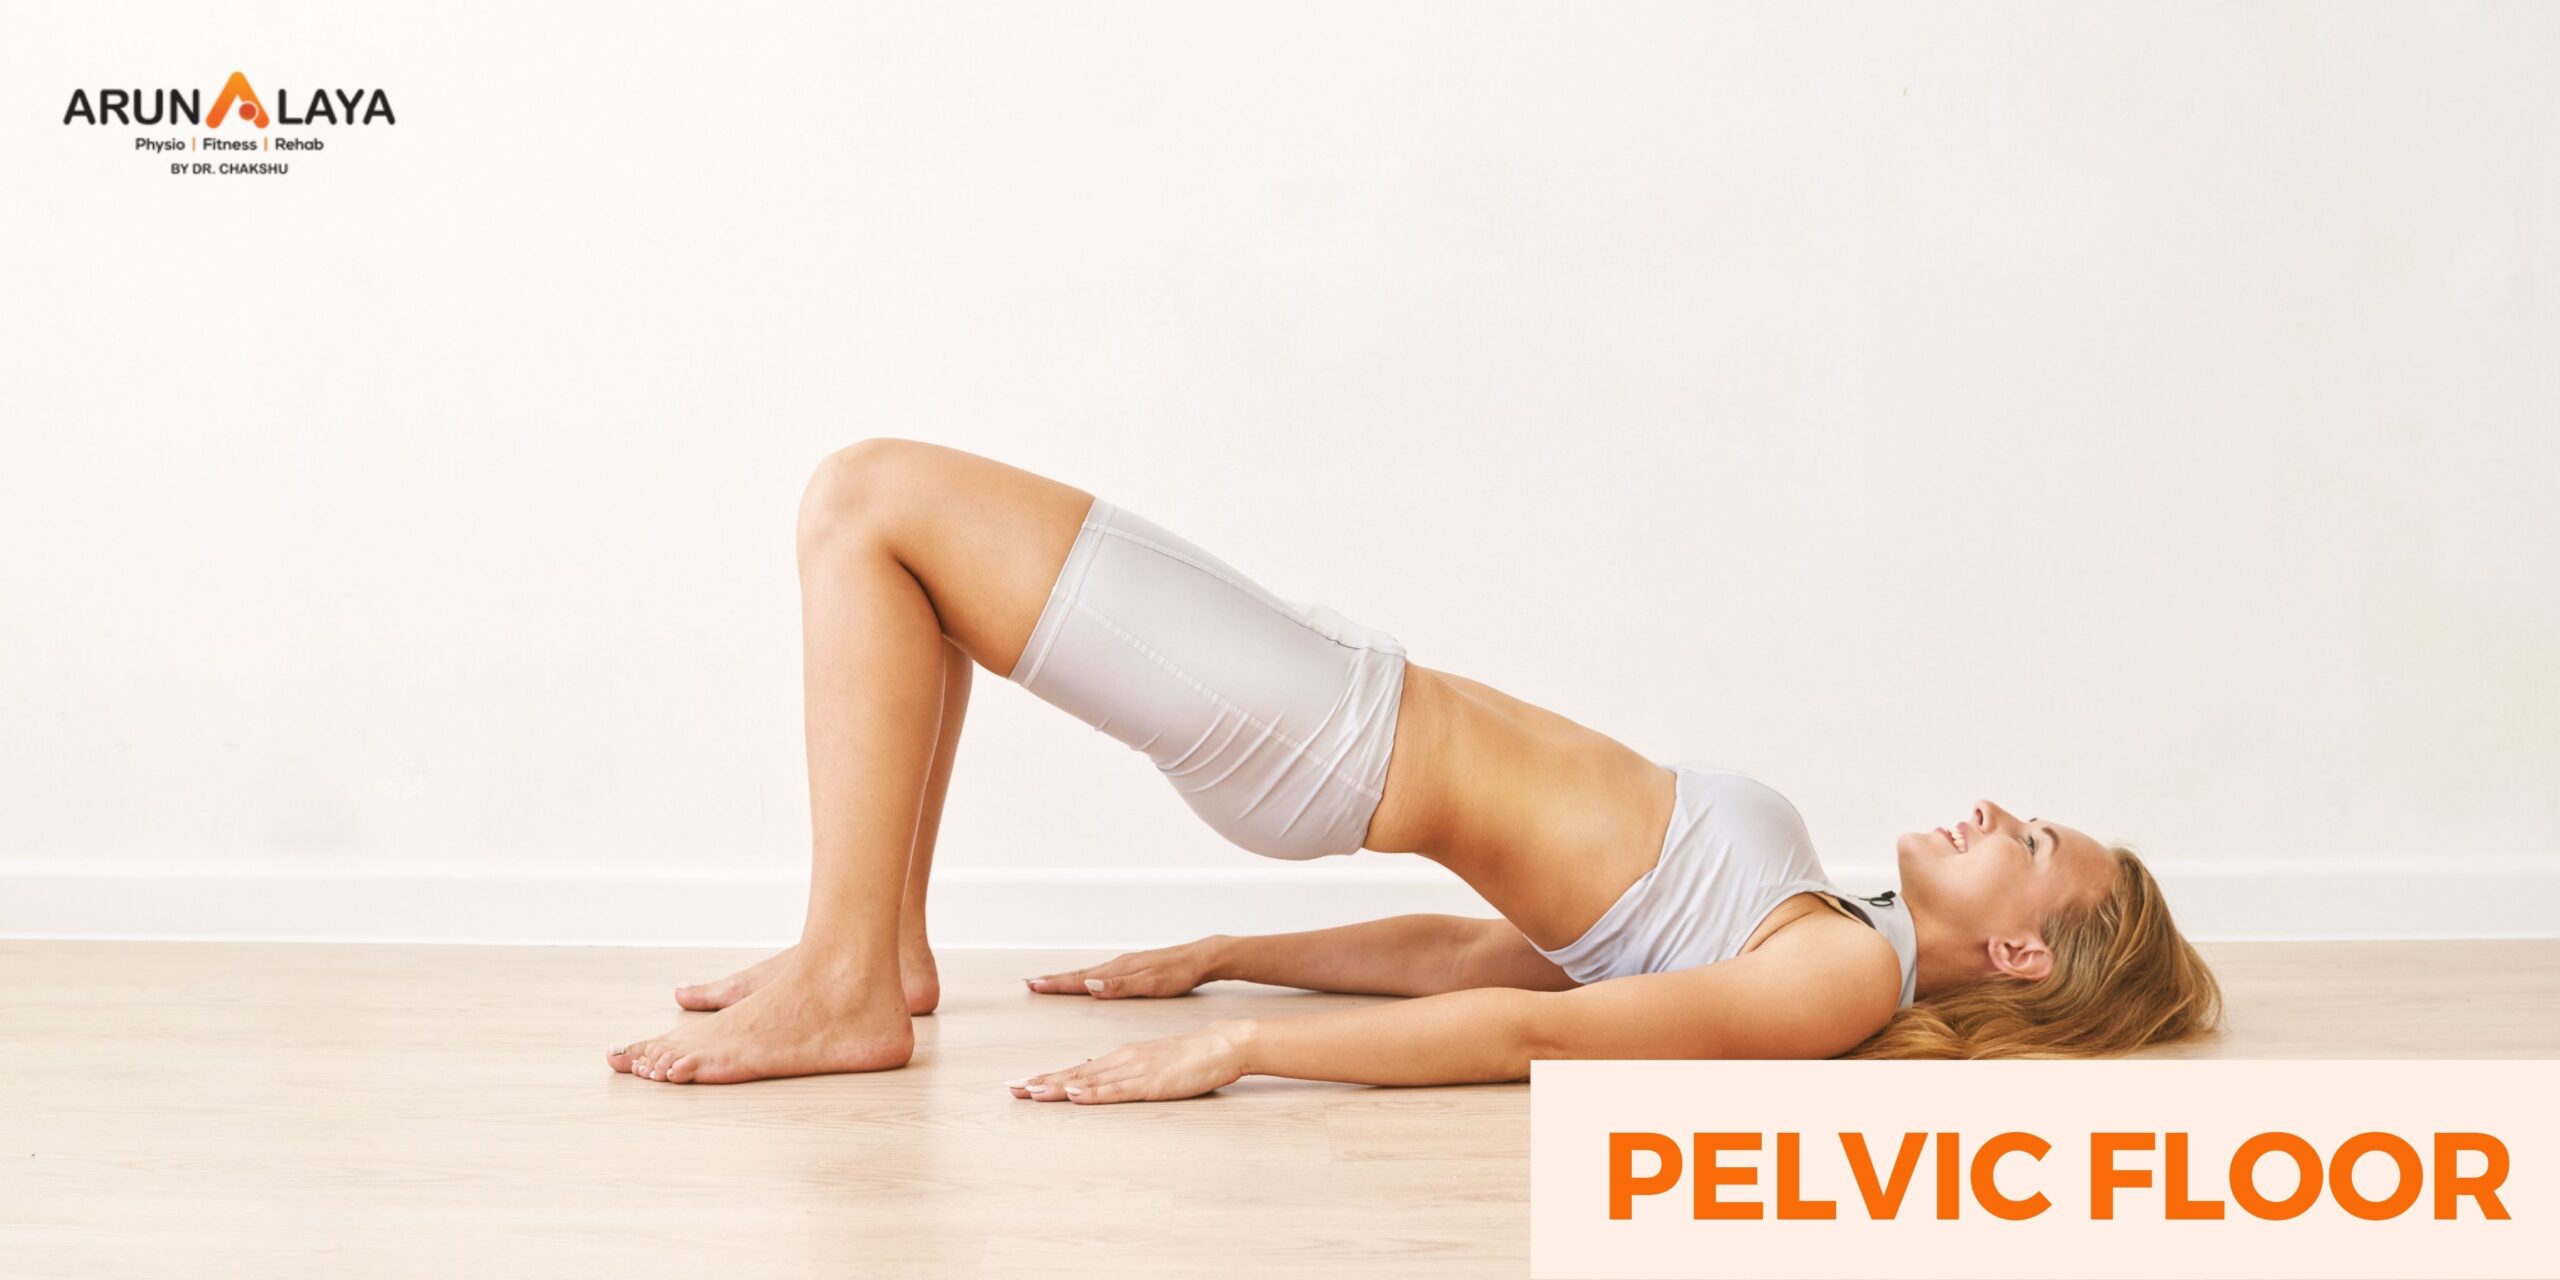
  1. Strengthening Pelvic Floor Muscles: A skilled pelvic floor physiotherapist can devise a personalized exercise regimen to fortify weakened pelvic floor muscles. These exercises can alleviate incontinence and enhance pelvic support.
  2. Education and Lifestyle Guidance: Women undergoing menopause can greatly benefit from expert counsel on managing their pelvic health through lifestyle adjustments, encompassing diet, hydration, and exercise.
  3. Techniques for Vaginal Health: Pelvic floor physiotherapists can educate women on techniques for maintaining vaginal health, including the utilization of vaginal moisturizers and dilators.
  4. Pain Management: For women enduring pelvic discomfort or pain, physiotherapy can offer relief through manual techniques and tailored exercises.

Conclusion:

Menopause represents a transformative stage in a woman’s life, and it need not be synonymous with discomfort or pain. Pelvic floor physiotherapy embraces a holistic approach to managing pelvic health concerns associated with menopause, allowing women to regain control and live their lives comfortably and confidently. Seeking the guidance of a qualified pelvic floor physiotherapist empowers women to gracefully navigate this phase with vitality and well-being.

Kegel Exercises: The Complete Guide

Kegel exercises are designed to strengthen the muscles of your pelvic floor, providing support for your bladder and bowel function. These exercises involve a simple clench-and-release technique that targets the pelvic floor muscles. The pelvic floor refers to a collection of muscles and tissues that form a sling or hammock-like structure at the bottom of your pelvis, supporting your reproductive organs. Weakness in the pelvic floor can contribute to problems like loss of bladder or bowel control. By regularly performing Kegel exercises, you can enhance the strength and functionality of your pelvic floor muscles.

Why Do Kegel Exercises?

  • Both women and men can benefit from performing Kegel exercises to strengthen their pelvic floor muscles.
  • Various factors, including pregnancy, childbirth, aging, and weight gain, can contribute to the weakening of the pelvic floor muscles in women.
  • The pelvic floor muscles are responsible for supporting the womb, bladder, and bowels. When these muscles are weak, the pelvic organs may descend into the vagina, causing discomfort and potentially leading to urinary incontinence.
  • Men can also experience a decline in the strength of their pelvic floor muscles as they age. This can result in both urinary and fecal incontinence, especially for those who have undergone prostate surgery.

Finding the pelvic floor muscles in Women

  • When beginning Kegel exercises, it can be challenging to identify the correct set of muscles to target.
  • One method to locate these muscles is by gently inserting a clean finger into the vagina and then tightening the vaginal muscles around the finger.
  • Another way is to attempt to halt the flow of urine while urinating. The muscles engaged in this action are the pelvic floor muscles.
  • Familiarize yourself with the sensation of contracting and relaxing these muscles.
  • However, it is important to note that stopping and starting urine regularly or frequently doing Kegel exercises with a full bladder is not recommended, as it can lead to incomplete bladder emptying and increase the risk of urinary tract infections (UTIs).
  • If you are unsure whether you have correctly identified the pelvic floor muscles, it is advisable to consult with your gynaecologist for guidance.
  • Your gynaecologist may suggest using a vaginal cone, which is inserted into the vagina and held in place using the pelvic floor muscles.
  • Biofeedback training is another helpful method for identifying and isolating the pelvic floor muscles. This procedure involves the insertion of a small probe into the vagina or the placement of adhesive electrodes on the external area of the vagina or anus.
  • During the training, you will be instructed to perform a Kegel contraction. A monitor will display whether you have engaged the correct muscles and the duration of the contraction.

Finding the pelvic floor muscles in Men

  • Men can encounter similar difficulties in identifying the appropriate group of pelvic floor muscles.
  • To locate these muscles, men can try inserting a finger into the rectum and attempt to squeeze it, while ensuring that the muscles of the abdomen, buttocks, or thighs are not tightened.
  • Another helpful technique is to contract the muscles responsible for preventing the release of gas.
  • If difficulties persist, practicing the interruption of urine flow can be a reliable method. However, it is important to note that this should not become a regular practice.

Goals and Benefits of Kegel Exercises

  • Always empty your bladder before performing Kegel exercises. As a beginner, find a quiet and private place to sit or lie down for your exercises. As you practice, you will discover that you can perform them anywhere.
  • When you start doing Kegel exercises, tense the muscles in your pelvic floor for a count of three, and then relax them for a count of three. Repeat this sequence for 10 repetitions. Over the next several days, continue practicing until you can hold the muscle tension for a count of 10. Aim to do three sets of 10 repetitions every day.
  • Do not be discouraged if you do not see immediate results. According to the Mayo Clinic, it may take a few months for Kegel exercises to have an effect on urinary incontinence.
  • Additionally, Kegels work differently for each person. Some people experience significant improvement in muscle control and urinary continence, while for others, Kegels may help prevent the condition from worsening.

Cautions

  • If you experience pain in your abdomen or back following a session of Kegel exercises, it indicates that you are not performing them correctly. Remember that while contracting your pelvic floor muscles, the muscles in your abdomen, back, buttocks, and sides should remain relaxed.
  • Lastly, it is important not to overexert yourself during Kegel exercises. Working the muscles excessively can lead to fatigue and hinder their ability to perform their essential functions.

How Can you do Kegel Exercises?

  • Both men and women can perform Kegel exercises using the same approach.
  • To begin, it is important to locate your pelvic floor muscles, often referred to as PC muscles. You can identify these muscles by interrupting the flow of urine while urinating.
  • The muscles engaged in stopping the urine flow are your PC muscles.
  • These muscles also play a role in controlling the release of gas. In men, contracting the PC muscles may cause the testicles to rise.


Try the Easiest Kegel Exercises

  • After locating your PC muscles, you can begin practicing flexing them.
  • Contract and hold your PC muscles for a duration of 5 to 20 seconds.
  • Subsequently, release the contraction.
  • Repeat this exercise 10 to 20 times consecutively, three to four times a day.
  • Gradually increase the number of contractions and the duration of each contraction.
  • Over time, this straightforward exercise can contribute to strengthening your PC muscles.
  • This, in turn, may lead to improvements in bladder control and sexual function.

Add Variety to your Workout

  • To add variety to your Kegel workout, consider trying different variations of the basic exercise.
  • For instance, you can contract and release your PC muscles rapidly, performing several repetitions in quick succession.
  • Another option is to practice contracting the muscles slowly, emphasizing control and endurance.
  • Additionally, you can experiment with different positions while performing Kegel exercises, such as standing, sitting, or lying down.
  • While engaging in Kegel exercises, make a conscious effort to avoid tightening other muscles, such as your abdominal muscles, buttocks, or thighs.
  • It is also important not to hold your breath. Instead, maintain a relaxed and steady breathing pattern while keeping the rest of your body still and relaxed.

Cyclist’s Palsy

Cyclist’s palsy, also known by various names such as handlebar palsy, ulnar tunnel syndrome, ulnar nerve compression, Guyon Canal Syndrome (GCS), bicycler’s neuropathy, or tardy ulnar palsy, is an overuse injury that primarily affects the hands and fingers. It occurs when the nerves in the wrist or the side of the palm near the pinky finger become compressed due to repetitive stress.

Cause of cyclist palsy

  • Cyclist’s palsy can cause both motor and sensory symptoms.
  • The motor symptoms can include weak hand grip and difficulty using fingers for precise tasks.
  • Whereas the common sensory effects include numbness, tingling, and pain.

Although cyclist’s palsy is increasingly common, it is often underreported among cyclists. In fact, a study revealed that 7 out of 10 participants reported experiencing motor or sensory symptoms. Severe nerve injury can lead to paralysis or irreversible loss of sensation in the affected hand.

The pressure exerted on the handlebars during prolonged cycling can irritate the nerves in the palm. The highest pressure occurs where the median and ulnar nerves enter the hand, which corresponds to positions like “tops,” “ramps,” “hoods,” and “drops.” The “drops” position applies the most pressure on the ulnar nerve, while the “hoods” position applies slightly less pressure. The “tops” position places significant pressure on the palm at the base of the ring finger. The “drops” position can also cause excessive wrist extension, increasing pressure on the carpal tunnel. If a cyclist already has nerve compression at the neck or elbow, it can be more easily triggered at the palm, potentially leading to carpal tunnel syndrome or cubital tunnel syndrome.

Signs and Symptoms

  • include numbness, tingling, and sensory changes in the little finger and the ring finger on the side closest to the little finger
  • the palm in that area may also become numb, while there is no numbness on the back of the hand.
  • The symptoms can vary depending on the location of pressure. Sometimes manifesting as numbness or weakness, or a combination of both.
  • When the median nerve is affected, numbness and tingling occur on the palm side of the thumb, index, long, and ring fingers (on the side closest to the middle finger). But there is no numbness on the back of the hand.
  • Prolonged or severe pressure on the nerves can also weaken the associated muscles. Some cyclists may experience pain along with hand numbness.

Treatment

Limiting cycling is the most effective treatment for cyclist’s palsies. However, there are other measures that can allow cyclists to continue their activity while reducing the risk of exacerbating the condition. These include :

  • Limiting the length or distance of the ride
  • Having enough rest between longer cycling sessions
  • Changing positions of grip on the handlebars
  • Changing to a transverse handlebar
  • Adjusting the seat height
  • Using gloves to reduce or distribute pressure. The pressure can be reduced with foam or gel padding in the palm of the glove.

Top 3 Cyclist Palsy Exercises

In addition to these measures, exercises play a crucial role in long-term recovery and preventing recurrence of cyclist’s palsy. These exercises primarily focus on strengthening the muscles, ligaments, and tendons in the hands. The top three recommended exercises for cyclist’s palsy are as follows:

  1. Finger bending exercise: Begin by stretching your hand and then bend the fingers of the affected hand at a right angle, holding them in that position for approximately 10 seconds. Ensure that your fingers remain straight during the exercise. Repeat this process five times.
  2. Finger squeeze: Take a small object like a coin or a sheet of paper and squeeze it between two fingers, holding the grip for 10 seconds. Repeat this exercise five times for each set of fingers.
  3. Grip strengthening exercise: This exercise targets a weak hand grip. Squeeze a rubber ball with the affected hand and hold for 10 seconds and then release. Repeat 10 times, and that’s one set. Aim for 3 sets of 10 as you gradually build up grip strength.


ROLE OF PHYSIOTHERAPY IN HIP DYSPLASIA

Hip dysplasia or developmental dislocation of the hip (DDH), is an abnormal formation of the hip joint. In hip dysplasia, the femoral head (the ball) fits too loosely into the acetabulum (the socket), causing instability. The disorder typically develops during gestation or shortly after birth, but may develop later in childhood. In the past, this condition was referred to as congenital dysplasia of the hip (CDH).

CAUSES

Many people are born with hip dysplasia but are likely unaware because symptoms don’t often present themselves until adulthood.

Other times, it is typically developed within the first year of a person’s life.

Adults can develop hip dysplasia, but it is most often a diagnosis that wasn’t determined in childhood likely from a lack of symptoms.

PHYSICAL SYMPTOMS

Someone suffering from hip dysplasia may:

  • Have legs that are different lengths
  • Have a leg that turns outward
  • Have uneven skin folds on their groin or thigh
  • Lean to one side when standing
  • Have minimal or complete loss of range of motion in the hip
  • Limp when walking

INTERNAL SYMPTOMS

Someone suffering from hip dysplasia may have internal symptoms like:

  • Pain when sleeping on the affected hip
  • Pain in the groin that increases with activity
  • A sensation of popping, snapping or catching at the hip
  • A stiff hip joint

PHYSIOTHERAPY TREATMENT

Weight loss and other lifestyle changes can improve the condition.

Physiotherapy includes

  • leg stretching particularly hip abductions

  • Banded lateral walk

  • Glute activation

When engaging in physical therapy exercises, it is usual for patients to be provided with applied heat before the exercise regimen and ice packs afterwards.

Physical therapy is a great option for patients to help:

  • Strengthen muscles surrounding the hip
  • Joint mobility
  • Correct poor posture
  • Tendon inflammation
  • Gait
  • Body awareness

Advance physiotherapy treatment

  • MFR
  • Kinesiology tape
  • Dry needling

Medical professionals also may recommend:

  • Including low- or non-impact exercises into your weekly routine to strengthen muscles and increase range of motion like:
  • Swimming
  • Aquatic therapy
  • Cycling
  • Bodyweight exercises
  • Losing or maintaining weight to reduce the stress and pain in the hip
  • Hippotherapy to improve motor function

Reverse Clamshell Exerise: Benefits and Instructions

If you’re seeking exercises to strengthen your hips, one often overlooked option is the Reverse Clamshell exercise. This variation targets a different set of hip muscles compared to the traditional version and offers numerous benefits.

Benefits of the Reverse Clamshell Exercise

The Reverse Clamshell exercise is a variation of the clamshell, renowned for its ability to enhance hip stability. While similar, it possesses unique advantages that make it a valuable addition to your exercise routine, alongside other individual exercises. These advantages include:

  1. Enhanced hip joint strength, with a specific emphasis on internal hip rotation.
  2. Strengthening of the gluteal muscles, particularly the Gluteus Medius, which leads to improved muscle function and activation.
  3. Stabilization of pelvic muscles.
  4. Increased muscle definition in the thighs and buttocks.

By incorporating the Reverse Clamshell exercise into your workout regimen, you can reduce the risk of injuries and alleviate lower back pain.

What Muscles Does the Reverse Clamshell Target?

This exercise primarily targets the following muscle groups:

  1. Inner thighs (hip abduction)
  2. Gluteal muscles, specifically the deep Gluteus Medius muscle.
  3. Pelvic muscles.

Clamshell Exercise Vs. Reverse Clamshell Exercise

Here is an image illustrating the regular clamshell exercise:

Different Benefits

Although both starting from a similar position, the clamshell and reverse clamshell exercises offer distinct benefits for the body. While the clamshell primarily strengthens the gluteus minimus and gluteus maximus muscles, the reverse clamshell works the inner rotators of the him. Incorporating both exercises into physical therapy can be beneficial for the hip flexors.

Different Muscle Groups

These exercises target different muscle groups. Unlike the clamshell, the reverse clamshell does not engage the gluteus maximus or the external rotators of the hip. Instead, it focuses on the inner rotators, which play a crucial role in stabilization and balance. During the reverse clamshell, you will feel the activation more in your outer thighs.

How to Perform the Reverse Clamshell Exercise

To perform the reverse clamshell exercise:

  1. Lie on your exercise mat on one side, with your legs stacked on top of each other and your knees bent at a 45-degree angle, as you would for the regular clamshell exercise.
  2. Keep your feet together. Rotate your top foot outward and raise it toward the sky. Take one second to lift your leg and three seconds to lower it, maintaining slow and controlled movements.
  3. Repeat for 10 to 15 repetitions before switching sides.

Some Tips

Here are some tips for performing the exercise:

  • Keep your upper body aligned and engage your abdominal muscles throughout.
  • Exhale as you engage your inner thighs, and inhale as you relax your muscles.
  • Avoid rolling forward, as having your top leg slightly more forward than your lower leg makes it easier to lift your foot. This can result in less activation of your glutes.

Make it Easier

If you find the exercise challenging, you can start with an easier exercise called the Single Leg Windshield Wiper stretch. Follow these steps as a beginner:

  1. Lie flat on your back, with your knees bent at a 90-degree angle and your feet flat on the floor.
  2. Move your feet slightly wider than hip-width apart.
  3. While keeping your left knee still, allow your right leg to fall toward the left leg. This inward rotation of your hip will create a stretch on the outside of your buttocks and hip.
  4. Hold this position for 20 to 30 seconds before returning to the starting position.
  5. Perform 10 to 15 repetitions before switching sides and allowing the left leg to fall. Ensure your core muscles are engaged throughout the exercise for added benefits.

W-Sitting: The Negative Impact on your Child

The w-sitting posture is sitting on the floor with both thighs rotated inwards and the feet outwards on both sides of the body (the legs make a W shape, hence the name).”

As we age, achieving the w-sitting posture becomes challenging for adults due to the gradual loss of hip mobility. This decline in mobility can be attributed to the natural growth of our muscles and bones, as well as the lack of exposure to extreme hip flexion in Western cultures.

In contrast, children find it easier to adopt the w-sitting posture. Their hip joints possess greater mobility, and they often spend significant amounts of time in positions with flexed hips. It is common for many typically developing children to occasionally transition into this posture during their playtime.

Children who have low resting muscle tone and/or joint hypermobility, characterized by “floppy” muscles, often find it effortless to adopt the w-sitting posture. They may even find it comfortable. Children with tight leg muscles, such as those with cerebral palsy, may have limited options and find the w-sitting posture as the only sustainable position for them.

Why Do Toddlers/Children W Sit?

  • Bone alignment/positioning in utero (how your child is built can predispose them to W sit)
  • Core/trunk weakness
  • Excessive hip flexibility and/or joint hypermobility
  • Low muscle tone (check out these exercises for hypotonia)
  • It’s easier! A wider base is easier, requires less muscle work, and is less fatiguing

Why physiotherapist don’t like W sitting?

Physiotherapists generally discourage the practice of W sitting for the following reasons:

  1. Inward rotation of knees: W sitting places the knees in a position of increased inward rotation. This can result in added stress on the knee joints, potentially leading to knee pain and discomfort over time.
  2. Potential for in-toeing: W sitting has the potential to contribute to in-toeing, particularly in children who are already hypermobile. In-toeing refers to a tendency for the feet to turn inward instead of pointing straight ahead. W sitting can exacerbate this condition, affecting the alignment and stability of the lower limbs.
  3. Leads to turned in toes: Feet turning in while they W sit day after day for several years can lead to turned-in toes in other activities, like standing, cruising, and walking.
  4. Makes walking difficult
  5. Limits Core strength and rotation
  6. Decreases Mobility in hips and ankles

To promote optimal musculoskeletal development and minimize the risk of knee-related issues and in-toeing, physiotherapists generally encourage alternative sitting positions that maintain proper alignment and promote healthy joint positioning.

What Can You Do About W Sitting ?

  1. Stretch

 You won’t be successful getting rid of W sitting if your child is tight. A good stretch needs to last at least 30 seconds. Singing songs or watching short videos can help pass the time!

  • Butterfly stretch
  • Hamstring stretching
  • Ankle stretching
  • Prevent in-toeing of the foot

  1. MFR
  2. KINESIOLOGY TAPING
  3. DRY NEEDLING
  4. STRENGTHENING CORE
  5. Break the habit

What is “Flat Foot” Actually ?

Flat foot is a foot deformity in which there is loss of medial longitudinal arch. It is also termed as
pes planus. Pes planus may be lifelong, or acquired through time. In this condition the entire sole
of the foot is in contact or near contact with the ground while standing.
flat foot is normal in infants and toddlers, because the foot’s arch hasn’t yet developed. Most
people’s arches develop throughout childhood, but some people never develop arches. This is a
normal variation in foot type, and people without arches may or may not have problems.
Some children have flexible flatfoot, in which the arch is visible when the child is sitting or
standing on tiptoes, but disappears when the child stands. Most children outgrow flexible
flatfoot without problems. Arches can also fall over time. Years of wear and tear can weaken the
tendon that runs along the inside of your ankle and helps support your arch.
Causes
Infants & children
Flat feet are common in children and are often caused by:
1)Heredity
2)Laxity of ligaments
3)Tight Achilles tendon
4)Lack of foot exercise
Typically a child’s arches begin developing in infancy and progress to normal arches in line with
normal growth patterns.
Adults can develop flat feet through injury, tight Achilles tendon, abnormal joint formation,
continued stresses on the foot and its arch, or simply as they age.
Some of the most common causes of flat feet in adults are:
1)Achilles Equinus contracture
2)Coalition of rearfoot joints
3)Failed or injured tendons
4)Arthritis
5)Marfan syndrome
6)Diabetes
7)Obesity
8)Pregnancy
9)Overuse & strain
10)Injury & fractures
The most identifiable symptoms and characteristics of flat feet are the decrease or lack of
arches in your feet (especially when weight bearing) and pain / fatigue along the inner side of
your feet and arches.Some issues caused by flat feet include:
1)Inflammation of soft tissue
2)Foot, arch, and leg fatigue
3)Heel, foot, and ankle pain
4)Knee, hip, and lower back pain
5)Rolled-in ankles
6)Abnormal walking patterns
7)Shin splints
8)Bunions
9)Hammertoe
10)Arthritis
11)Plantar fasciitis

Management of flat foot treatment
Treatment of flat feet will be started when you will start feeling pain or other foot, ankle
abnormality .
For children
At Advanced Foot & Ankle our podiatric specialists will conduct both a clinical exam and an
X-ray study to determine the type and cause of most flatfoot deformity.
Most cases of flat feet in children are genetic. However their feet are flexible in nature and can
be treated with:
1)Custom made insoles
2)Braces
3)Appropriate footwear
4)Exercise
5)Surgery – often the best treatment for preventing major developmental complications in the
future.
For Adults
Non-surgical treatment options for deterring the development of flat feet and its symptoms are:
1)Custom orthotics
2)Bracing & supports
3)Supportive footwear
4)Exercises
5)Physical Therapy
6)Weight loss
7)Daily activity modifications
8)Medication
9)Rest
Physiotherapy management will help to regain mobility of the foot, Strengthen the surrounding
muscles .Regain foot and ankle control Provide initial relief of pain by using ice pack wrapped
in a damp towel and placed on the foot or area of pain for 10-15 minute can help to reduce
soreness. Some patients prefer moist heat for pain relief.
1)Modalities : Heat and cold therapy is applied to enhance relaxation and reduces pain. Ultra
sound and pulsed electrical stimulation can also be used to relieve the pain. Electric stimulation
will helps to improve the blood circulation, thus enhancing the healing process and reducing any
swelling or discomfort.
2) Exercises: toe clawing exercises, arch muscle strengthening exercises, heel cord stretching,
calf and hammstring stretching, toe spreading exercises, toe walking, ankle ROM, Dorsiflexion
and plantar flexion of foot, gripping exercises. Releasing manually any tight muscles will also
develop arches and will bring the foot in shape. Kinesio taping to support and to avoid any
unwanted movement of muscle.
Advance techniques like dry needling on tendon and on trigger points will ease the pain .
If conservative treatment won’t help much in treating flat foot sign and symptoms then another
choice of treatment will be surgical.
Surgical interventions includes
1) tendon transfer
2) osteotomies
3) Arthrodesis.

SQUATTING – ARE YOU DOING IT CORRECTLY?

SQUATTING – ARE YOU DOING IT CORRECTLY?

Squatting is one of the best exercise to gain strength and muscle mass in the leg.

Full squatting involves nearly all the muscles in the body as it is the basic human movement pattern. Daily activities such as picking up stuff off the floor, toileting or sitting in chair or low sitting box involves squatting.

Exercise science says squats are excellent for building strength, power, mobility and muscle mass. Researches shown that squatting creates more growth hormone compared to leg press exercise. Growth hormone is important aspect for muscle mass.

 But question arises here, are you squatting correctly?

Improper squatting can be result of less stability and mobility of spine or any of the joint problem (hip, knee, ankle, foot).

How to squat properly?

 Let’s talk about positioning –

Head – To be held straight in line with the shoulders

Thoracic spine – To be slightly extended or neutral

Lumbar spine – Neutral stable throughout the movement

Hip joints – Stable, no outwards or inwards movement (medio-lateral)

No drooping (drop down of hips) should stay aligned with knees.

Knees – Aligned with hips and feet, stable, no excessive movement inside or outside, forward or back

Feet & ankle – Flat feet and stable, heels in contact with the ground at all the times.

These are few basic steps to follow while you squat.

So after knowing these, what will be the key requirements to do squat properly?

             Balance , stability and mobility

             Keep hips mobile

             Knee follow toes

Does squats hurts or bad for knees or it is a myth?

It’s a myth, while you do full squatting, forces on the connective tissue increases which will not produce any injury. Full depth squatting in fact increases knee joint ligament stability.

This can turn out to be bad only when there is loss of strength of certain muscles, any injury to ligament or meniscus, or unstable joint. Then you need to seek advice from physiotherapist in particular.

Other major factors which can lead to injury are:

             Fatigue (tiredness of muscles)

             Poor technique

             Faster repetition speed

             More resistance ( over load)

What improper squat can lead to?

             Low back pain

             Upper & middle back pain

             Ligaments sprain ( knee and ankle)

             Muscle strains

Injuries can come suddenly or can take a period of time to indicate you such as sprains and strains can come suddenly but low back pain due to abnormal bio-mechanics can take few days or months to show pain.

How to prevent these injuries?

“Prevention is better than cure”

There is increased risk of injuries when there is lack of knowledge among trainers or those who do exercises watching videos online which do not always justify exercise physiology and movement patterns.

Right thing is to consult sports or musculoskeletal physiotherapist for correcting movement patterns and exercise. Physiotherapist evaluates all the muscles, joints and mechanics of the body. Physio can recognize the faulty patterns or weak links in the body.

What is best to do if any injury or pain occurs during squatting exercise?

             Initially if something happen you should stop doing exercise.

             For sudden injury, apply ice with compression and take rest

             Avoid any vigorous activity

             Do not massage over the strained part of the body

*Best option is to consult either Sports physio or Musculoskeletal physio.

We “Pain Free Zone” has witnessed many cases like these in the past many years. Faulty mechanics was the primary reason for body aches such as low back pain, upper – mid back pain etc.

It is needful that a physio should assess gym going clients by movement pattern analysis.

Squatting movement at different angles, faulty mechanics to be under stood and analyzing muscle function.

Solved over hundreds of cases, we concentrate on the faulty root which is causing pain instead of looking at pain only and treating that part.

Is there any problem or anomaly which can be diagnosed mistakenly in place of faulty mechanics?

Yes of course, one of the example is low back pain – after doing MRI, disc bulge is seen and any medical professional can blame disc to be reason which is not always true.

Faulty mechanics such as increased low back arch (lordosis curvature increased) during squatting can over stress back musculature, or butt wink or SI joint dysfunction.

Fact – Disc bulge can be seen in most of the gym going people no need to be worry always.

For any pain with or without any injury, for correcting exercise pattern, kindly visit “PAIN FREE ZONE” once. We will assess you the way it should be. We will describe in detail what is causing discomfort to you.

You can visit us at www.physiotherapistindelhi.com or can visit pain free zone fb page.

All the advance physiotherapy treatment is carried out here in PFZ such as

Dry needling

IASTM

Taping

Manual therapy

Exercise program

Deep tissue release/ Sports massage

*Exercise program can turn your wrong way of doing squat into right way.

*Deep tissue release will transform your tight – tensioned muscle into much more relaxed state and helps in doing movement and exercises fluently.